
Appearance
Create Menu
After you have synced your catalog, the next step is to create a menu that utilizes your imported categories, items, and modifiers.
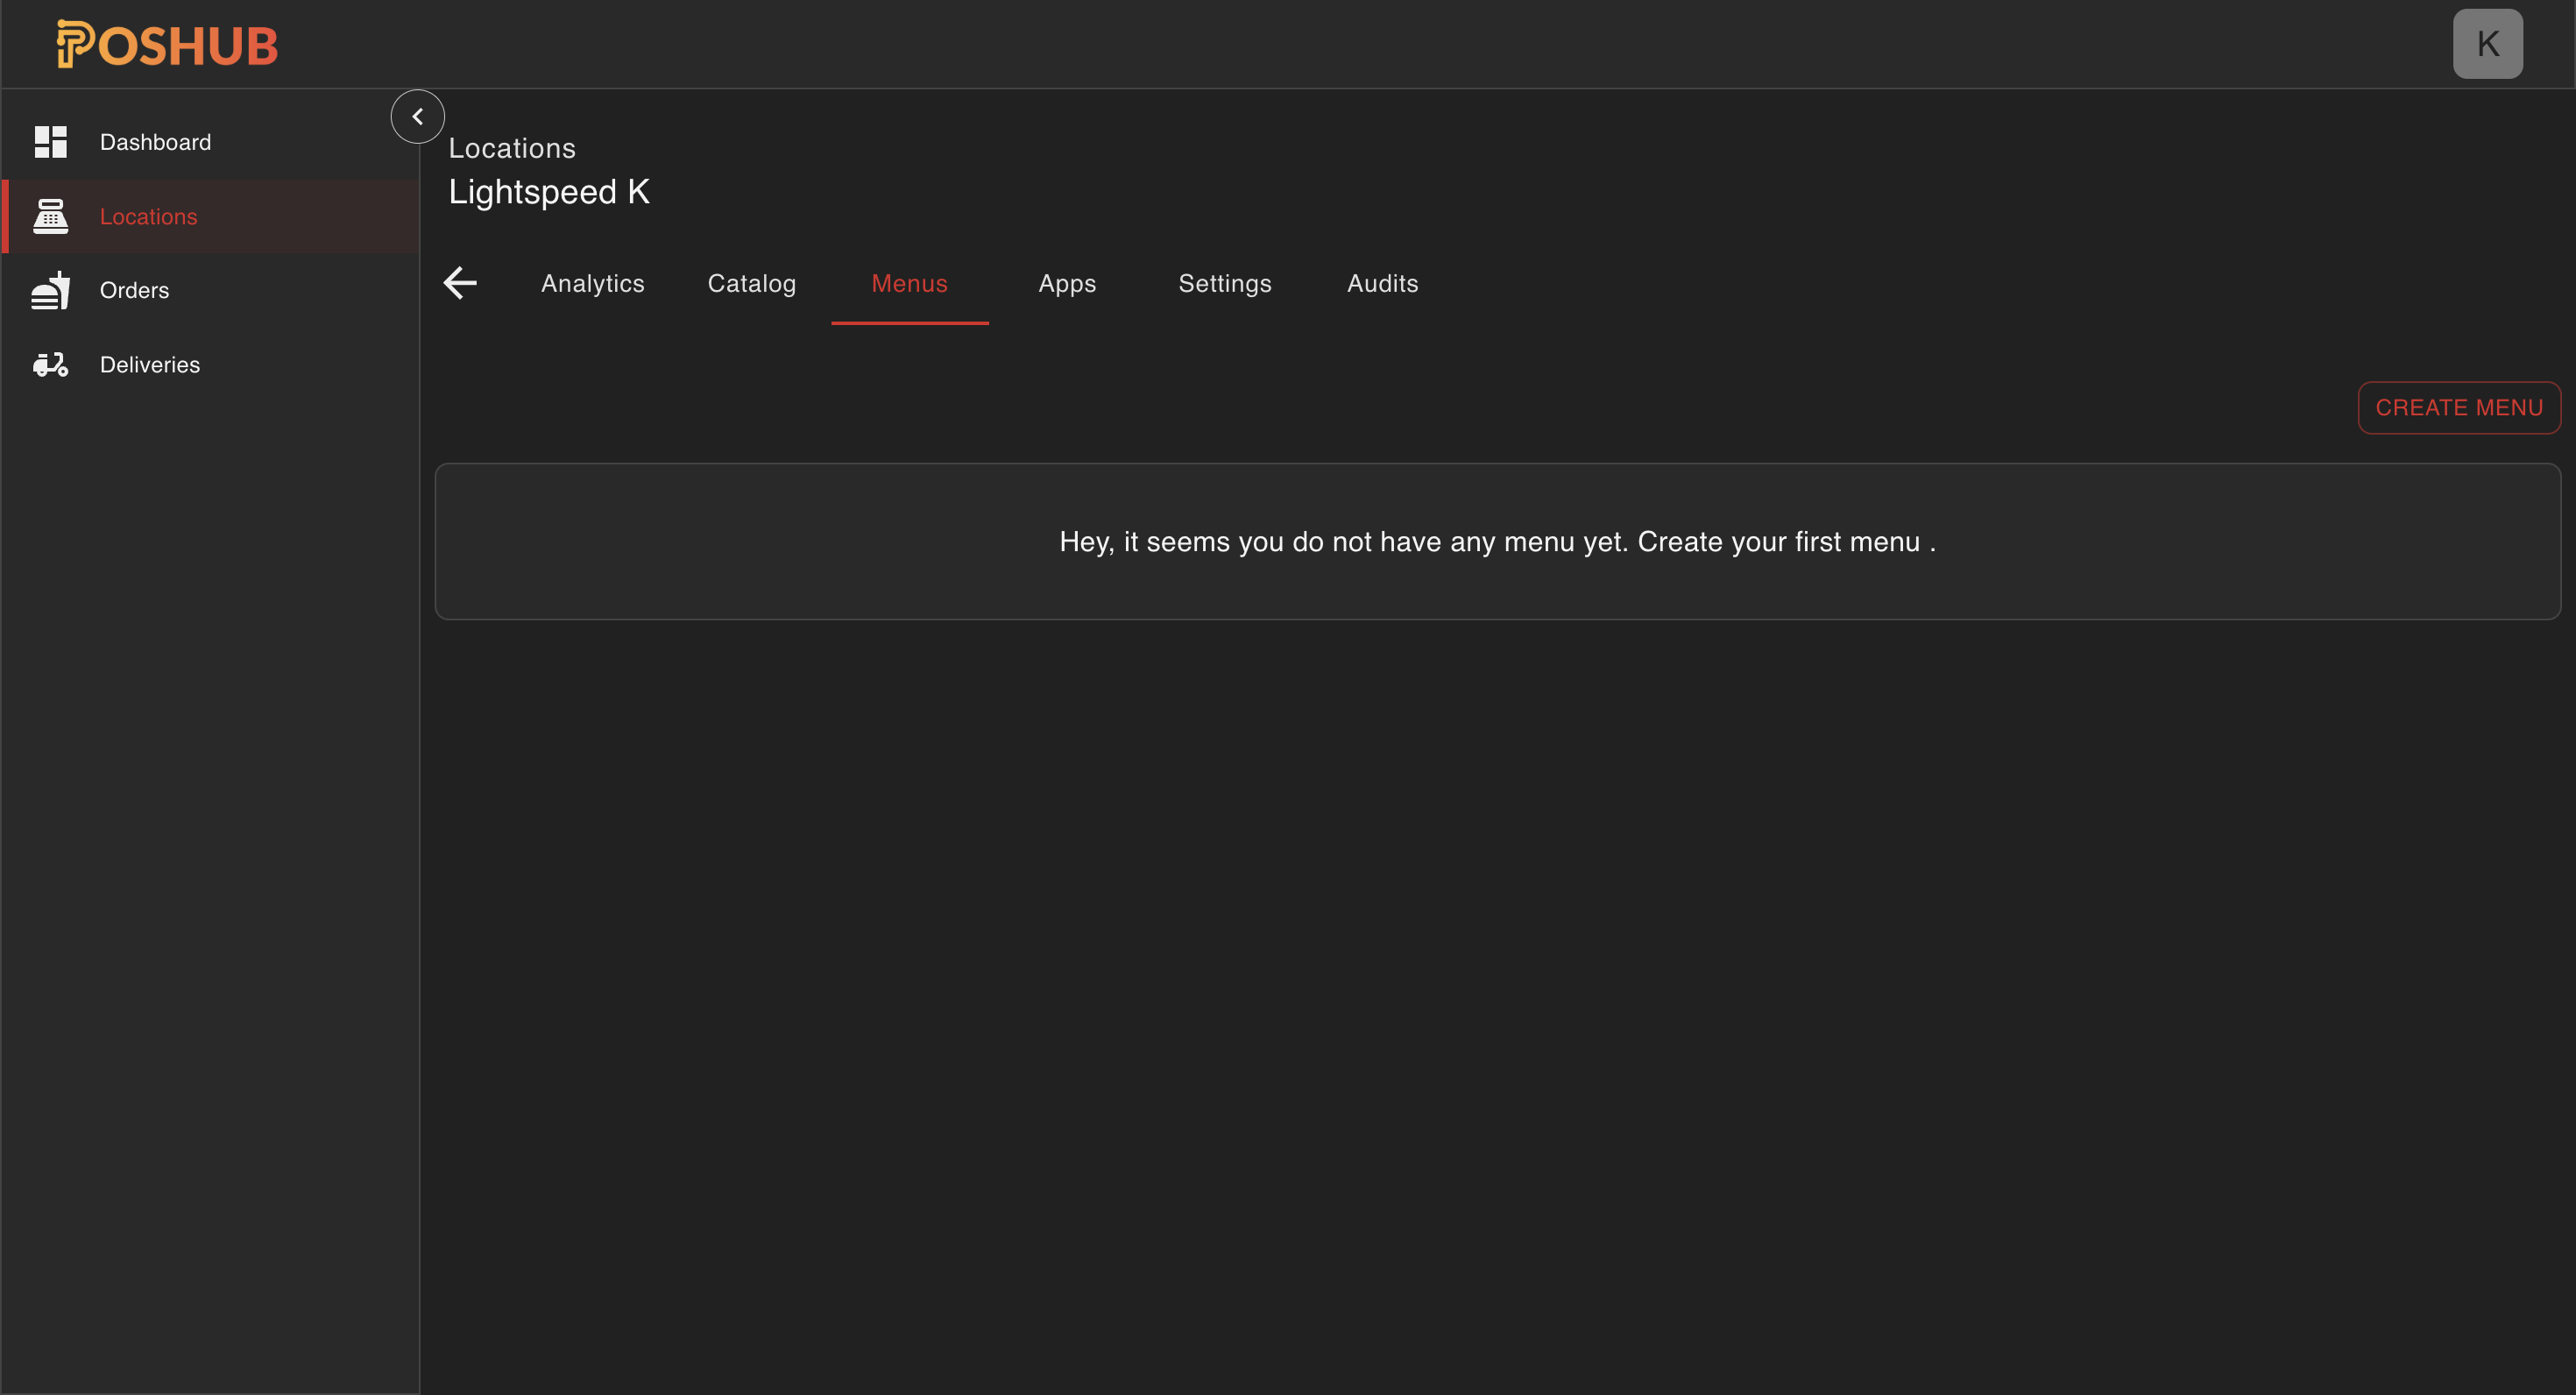
Accessing the Menu Tab
- Go to the Locations page in POS Hub.
- Click on the location for which you want to create the menu.
- You will now see a Menu tab appear in the top navigation bar for the selected location.
- Click on the Menu tab.
Creating a New Menu
In the Menu tab, click the Create Menu button in the top-right corner.
This opens a form with the following fields and options:
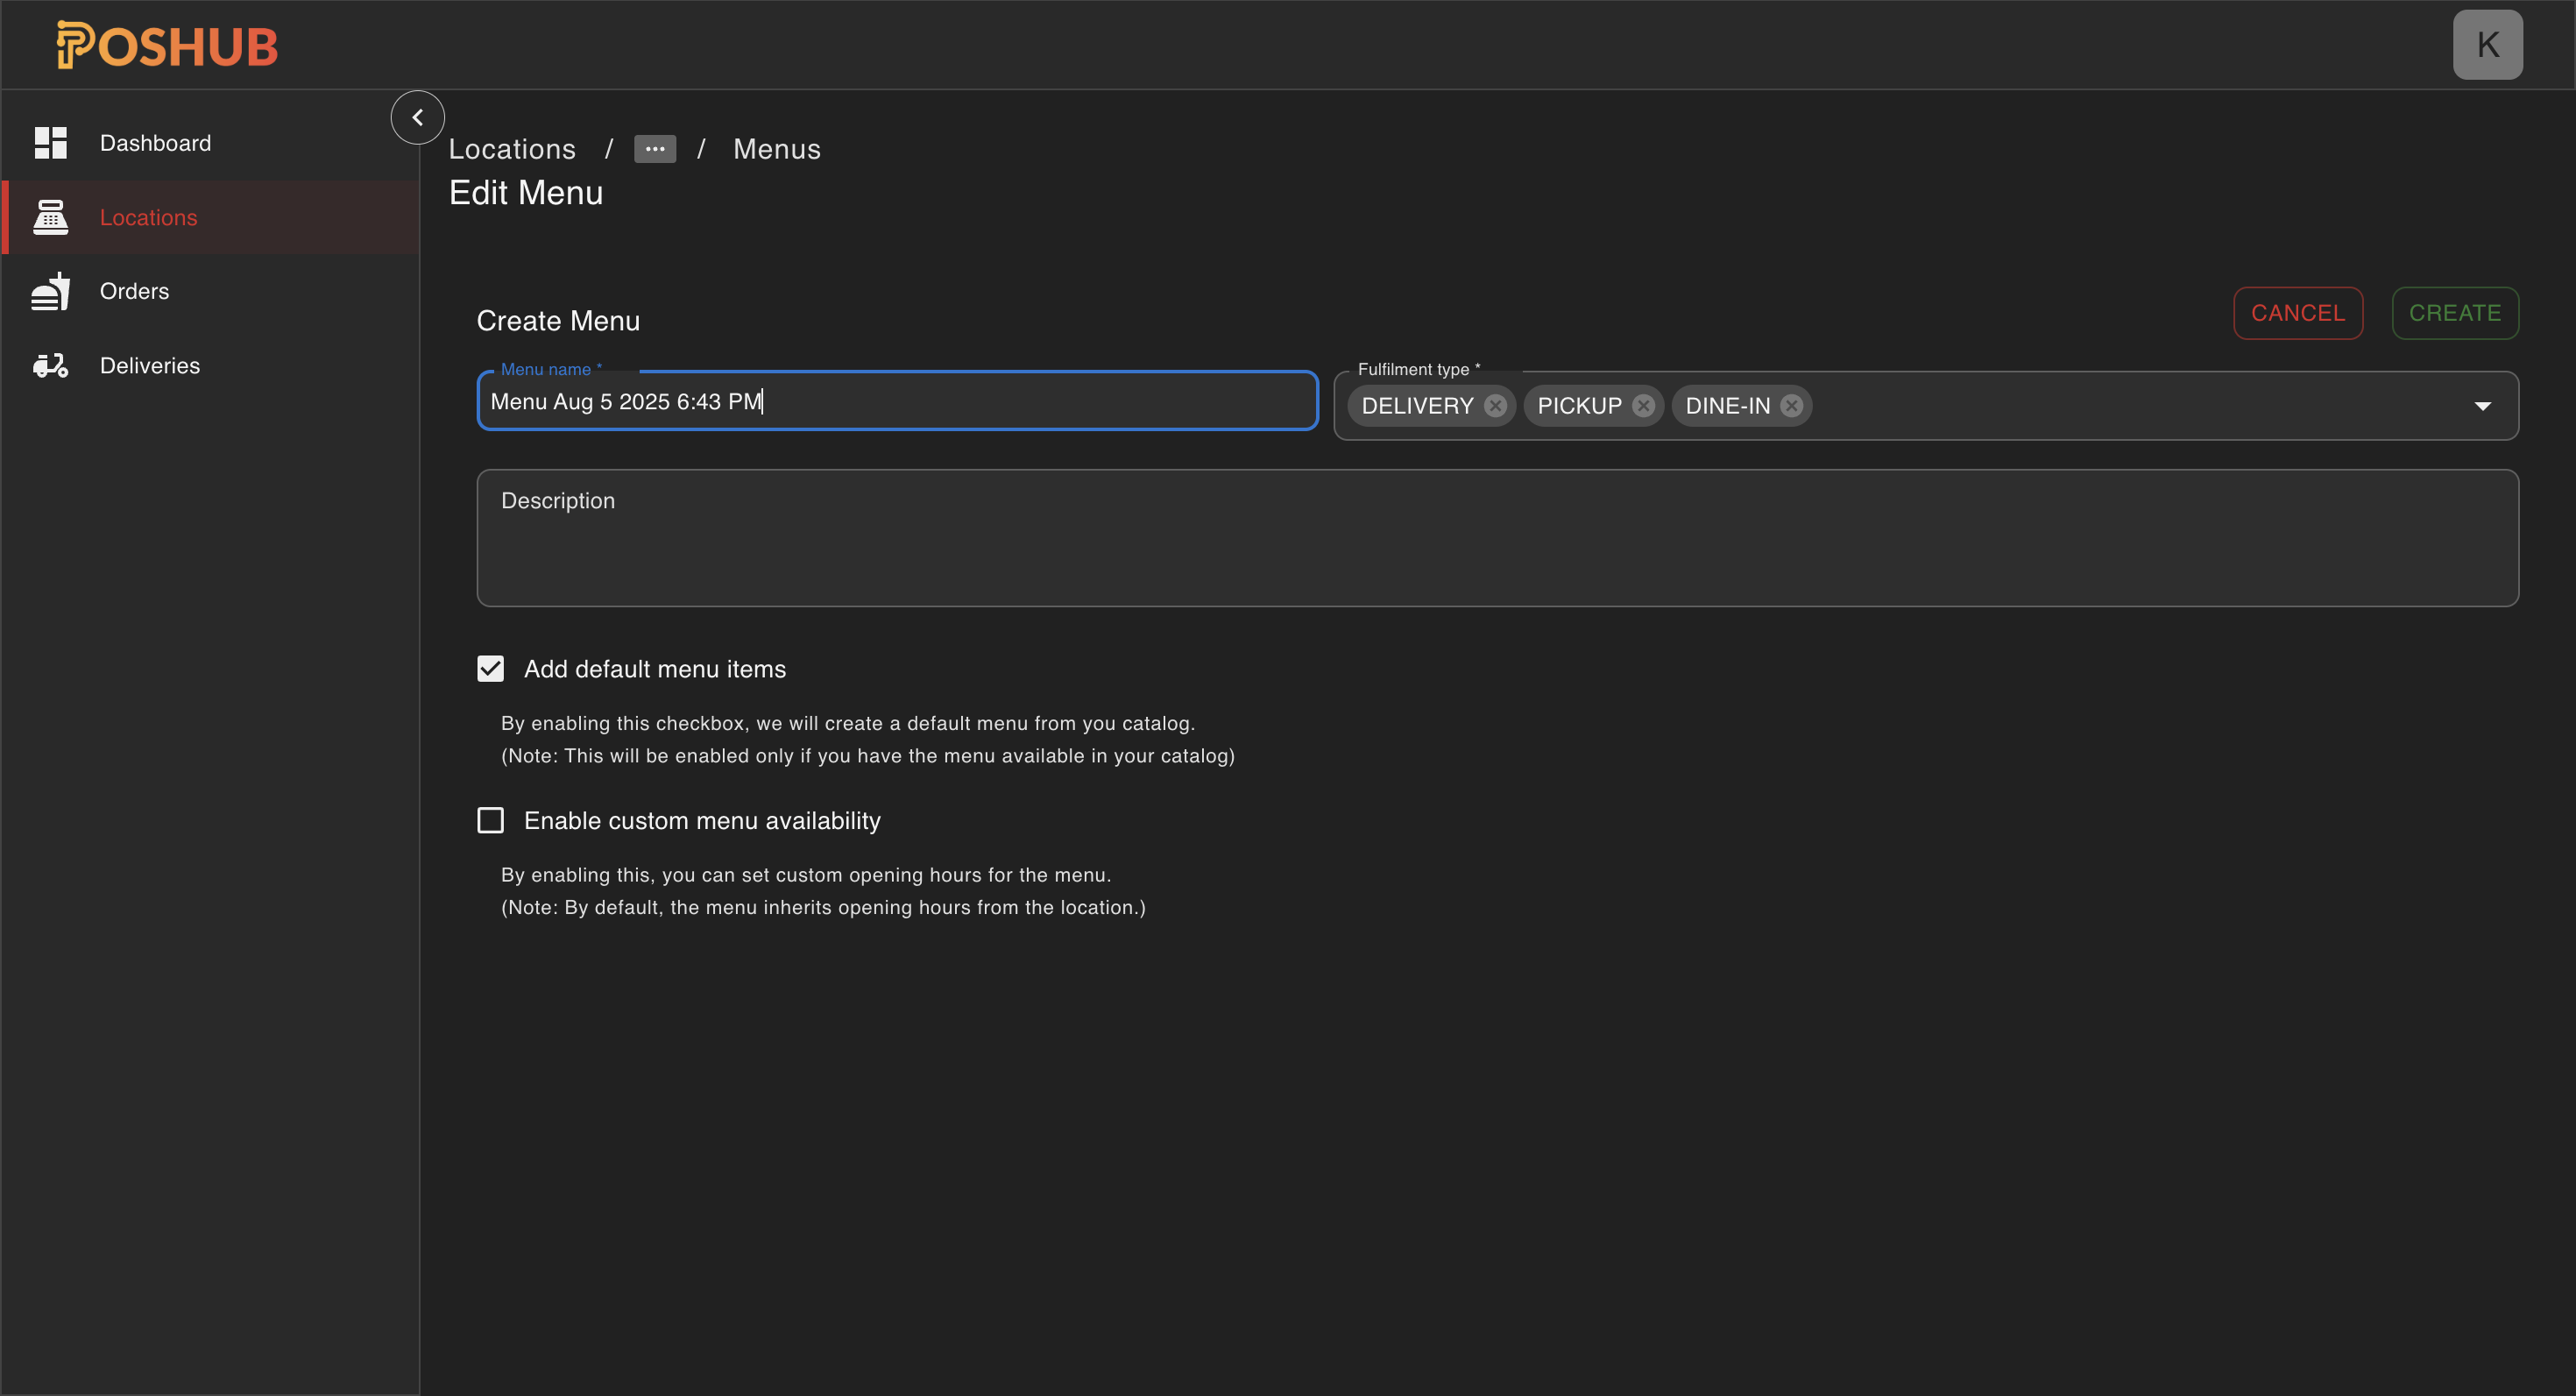
1. Menu Name
Give your menu a unique and descriptive name. For example: Lunch Specials, Delivery Menu, or In-Store Menu.
2. Description
(Optional) Add a brief description for the menu.
3. Fulfillment Types
Choose the fulfillment options for this menu. By default, all three options are selected:
- Delivery
- Pickup
- Dine-In
You can uncheck any of these options depending on how you want this menu to be used.
4. Add Default Menu Items
Checkbox Option
By enabling this option, POS Hub will automatically create a default menu for you using the items from your synced catalog.
Note: This option is only available if your catalog already contains menu data.
5. Enable Custom Menu Availability
Checkbox Option
Enable this if you want to define custom opening hours specifically for this menu.
Note: By default, menus will inherit the opening hours from the location settings. Enabling this will allow you to override that behavior.
For detailed information on how menu availability overrides location hours, see Opening Hours.
Once the form is completed, click the Create button to finish setup.
Continue to Publish Menu to learn how to publish the menu.